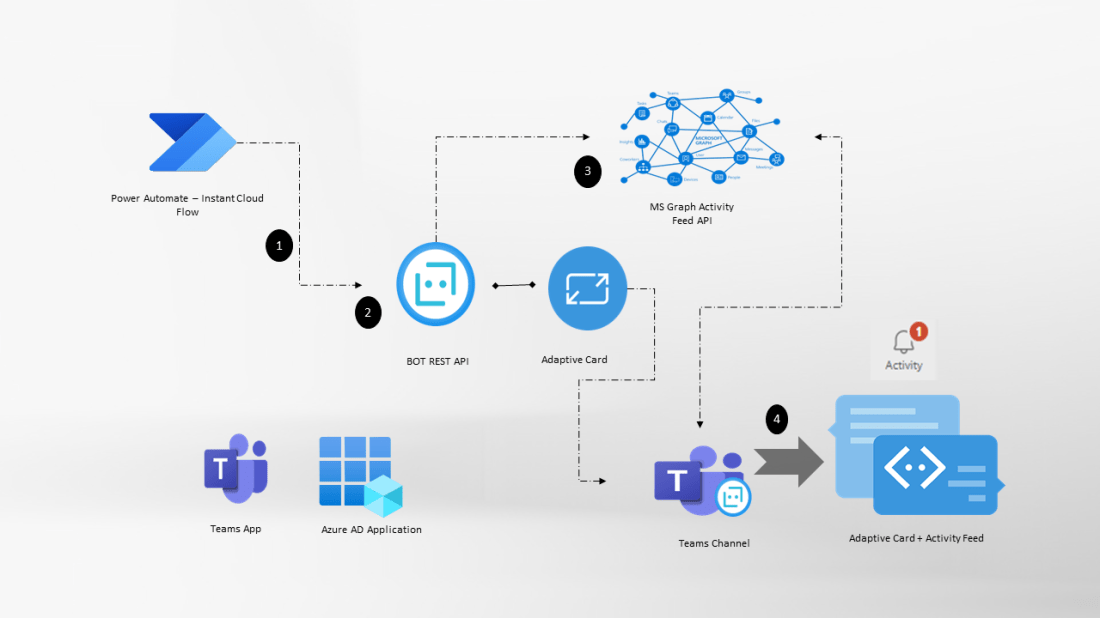
Activity feed notifications appears in the Teams activity feed panel with link to various locations thus enabling developers to build actionable content. These notifications are sent as push notifications in the Teams client. In this blogpost, let us see how to send Teams activity feed notification using
- Custom Teams App with a Bot
- Power Automate standard action: Post a feed notification
Pre-Requisites:
- Access to HTTP Premium Connector in Power Automate
- Access to register Azure AD Application in Azure AD Portal
- Access to the Teams Developer Portal
Custom Teams App with a Bot:
Microsoft graph has API endpoints to send activity feed notifications to Teams users. The pre-requisite to use the activity feed graph endpoint is to have a custom Teams app scoped to a Team, or in a chat or user.
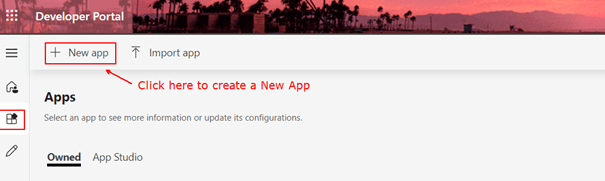
Step 1: Custom Teams App scoped to Team:
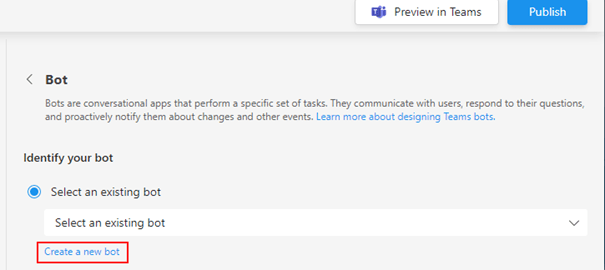
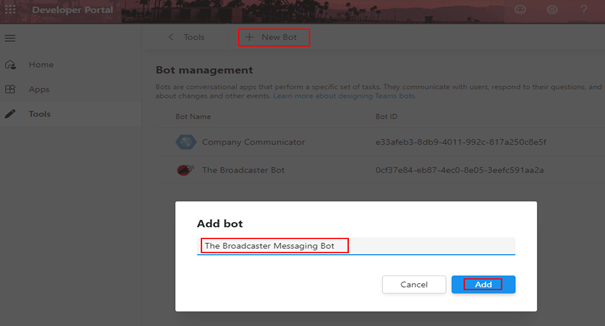
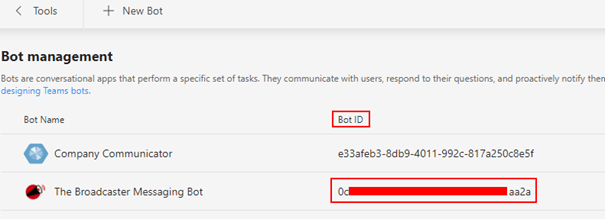
For this blogpost, I have used a custom Teams app scoped to a Team. Refer to the following blogpost to create a custom Team app scoped to a Team with a Bot capable of sending an Adaptive card message on a channel
Do not install the Teams App yet before completing the other steps given below. After the Teams bot is created, a custom Azure Active directory Application must be registered.
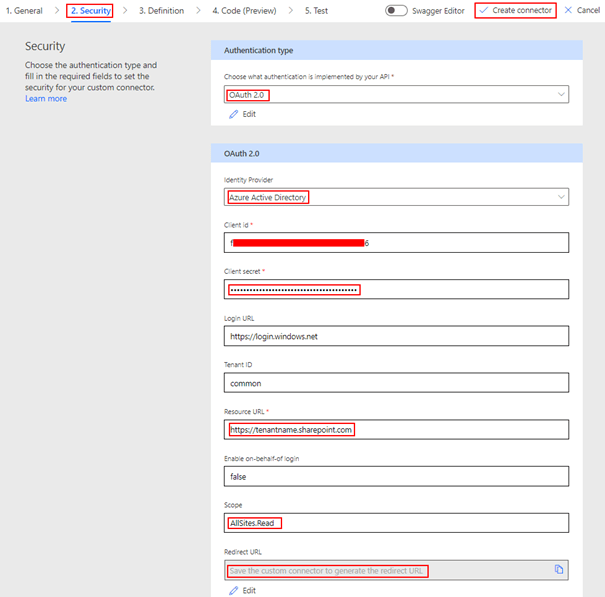
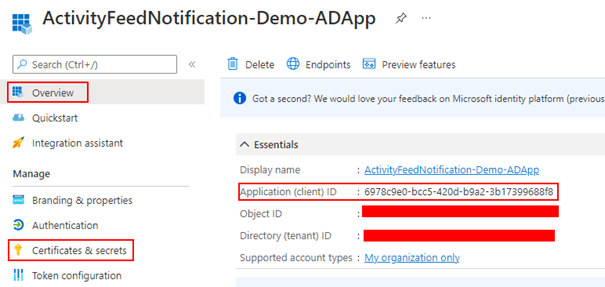
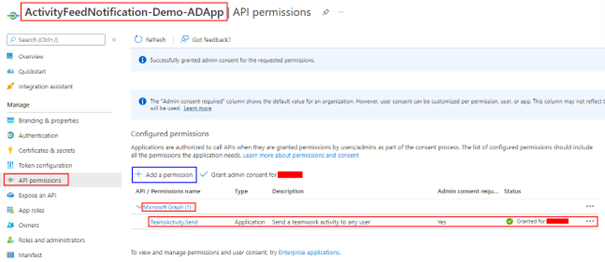
Step 2: Azure AD Application – Microsoft Graph Activity Feed permission:
Register an Azure AD application to add the Microsoft Graph permission to be send activity feed. Copy the Application (client) ID and Tenant Id of the registered app from the Overview section and create a secret from the Certificates & secrets under Manage blade per the screenshot shown below. Once the secret is created, copy the value to be used in the Power Automate cloud flow
Add the application permission TeamsActivity.Send with an admin consent.
Step 3: Link the AD app to the Teams App
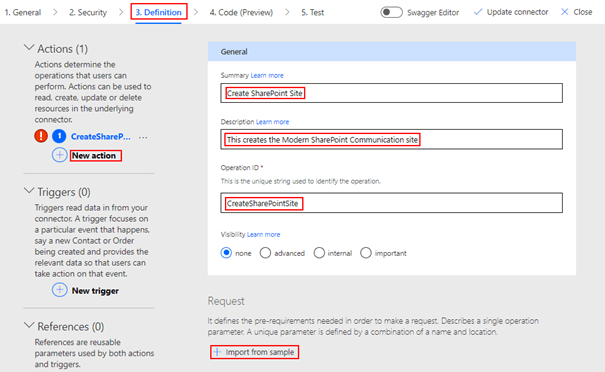
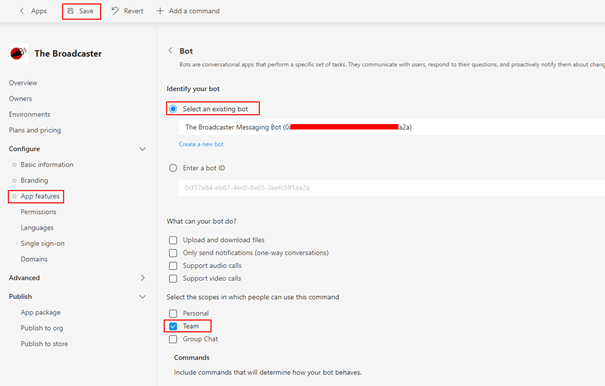
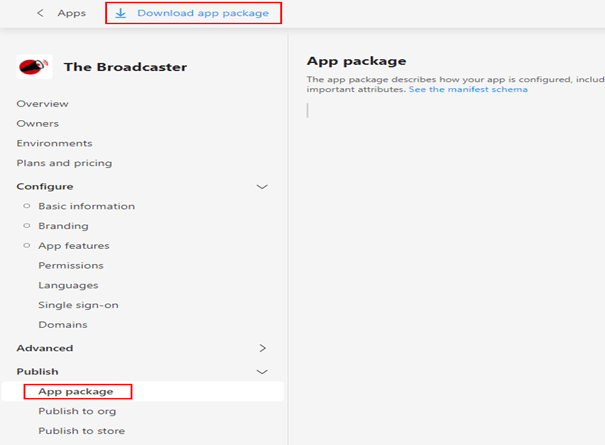
The AD application with permission to send activity feed is created, the next step is to link the Teams app created in Step 1 with the AD app. In the Teams Developer portal, enter the Application (client) ID in the apps Basic Information under the Overview section as shown in the below screen shot
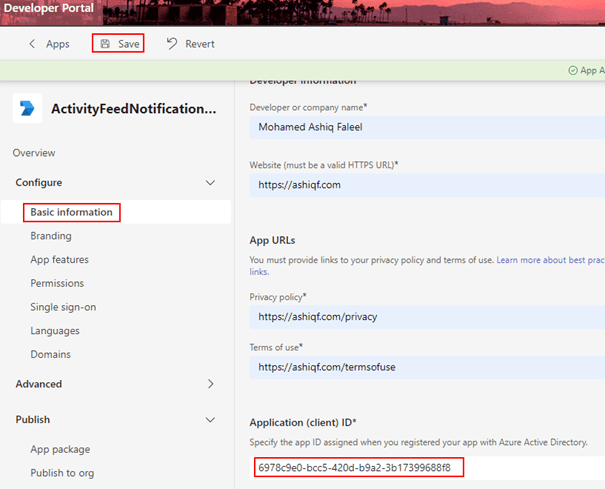
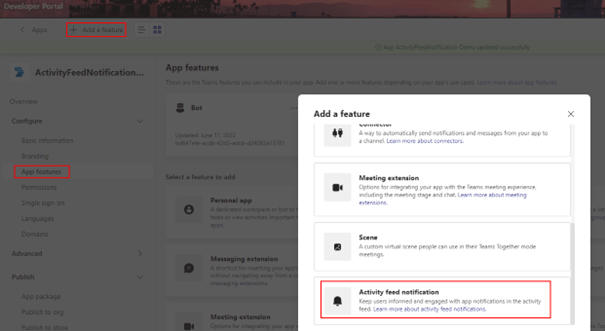
Don’t forget to Save the App in the Developer portal after the Application ID is entered. Now go to the App Features and then click Activity Feed notification as shown below
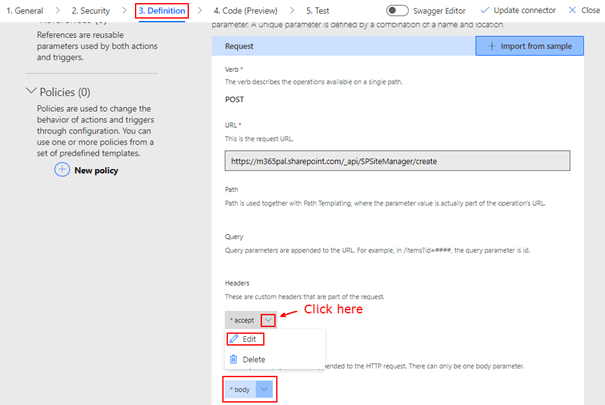
Click + Add an activity and enter the following information per the screenshot below
Type: informationBroadcasted
Description: Information Broadcasted Activity
Title: Notification from {actor} broadcasted by {broadcastedBy}

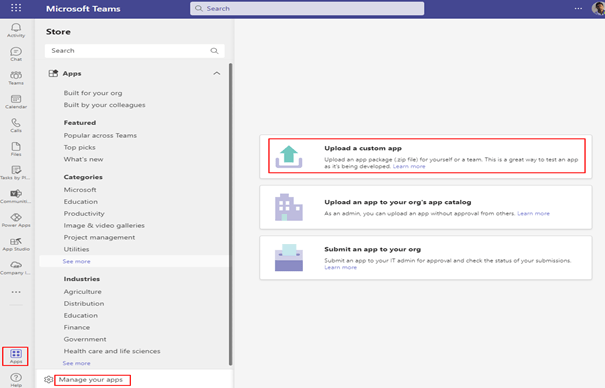
Click Save. The Teams app is now ready to be installed, follow the instructions here to install the bot in a Team for testing the Activity Feed notifications.
Power Automate Cloud Flow to send Adatpive card message and Activity Feed:
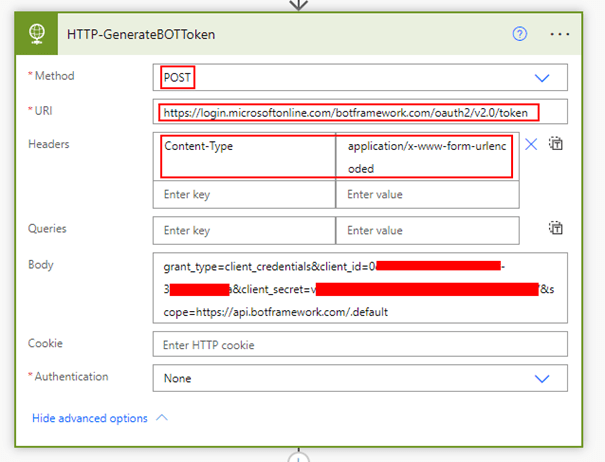
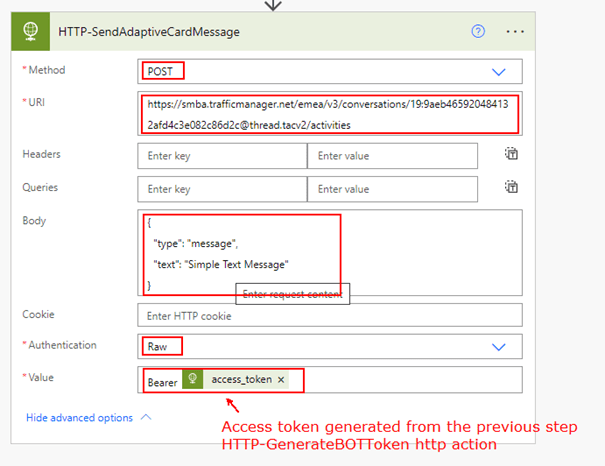
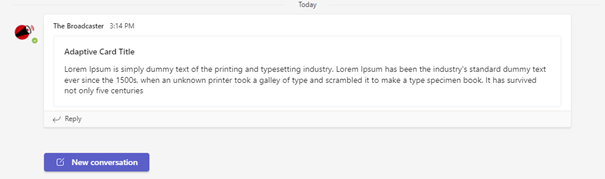
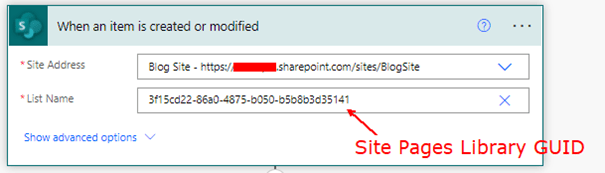
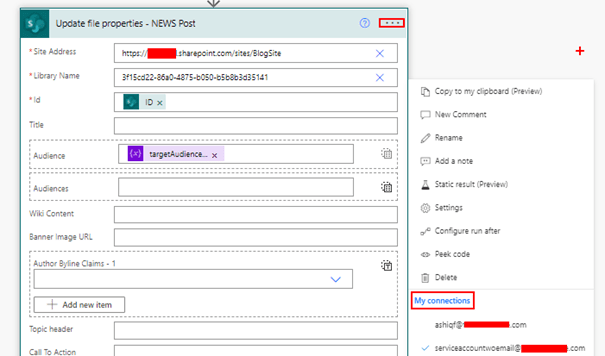
The Teams app is ready and now let’s create an Instant cloud flow with manual trigger to send an Adaptive card message to a Teams channel (General or any standard channel) and then Deep link to the adaptive card post in the Teams Channel to the activity feed notification. I have used a Premium HTTP connector action to send the adaptive card using Bot Framework REST API. Go through the following post to send the Adaptive card
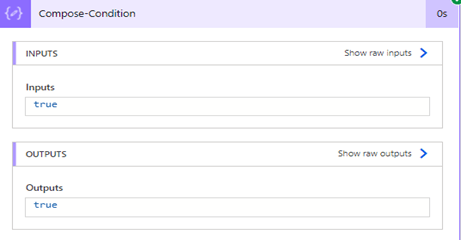
In the flow after the action HTTP-SendAdaptiveCardMessage, add a compose action with the following expression to get the Message ID of the Adaptive card channel message
body('HTTP-SendAdaptiveCardMessage')?['id']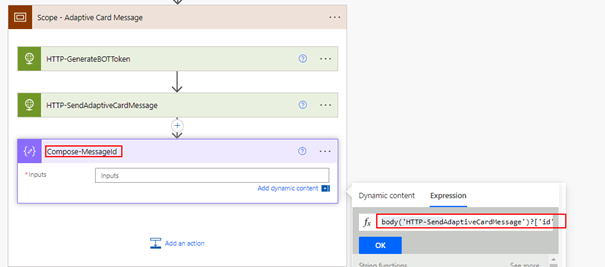
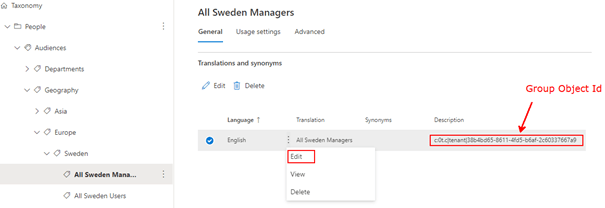
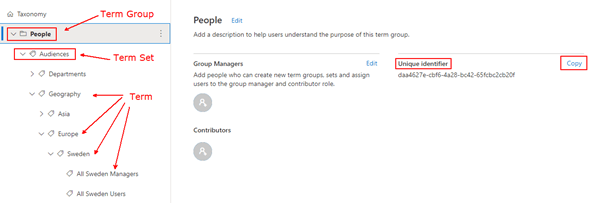
Add two compose action to store the TeamIdorGroupId and TeamChannelID as shown below

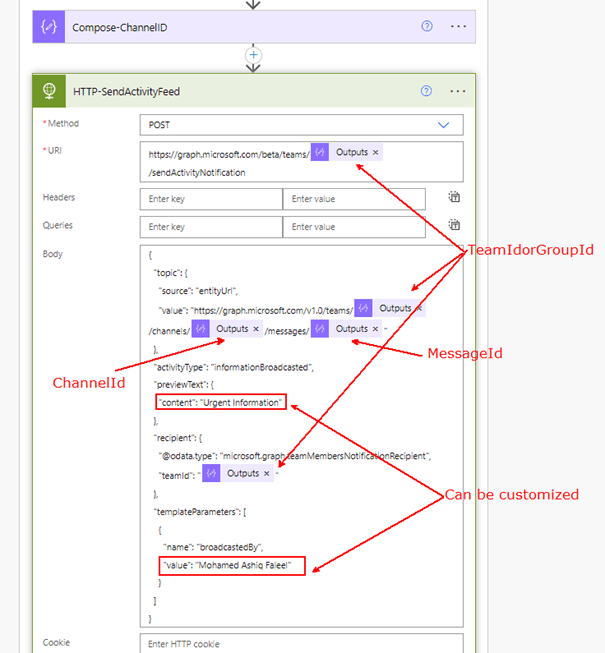
Add a HTTP action (Premium) to send the activity feed to all Team members (Beta) using the Graph Activity Feed API. Find the details below for the HTTP request
Type: POST
URI: https://graph.microsoft.com/beta/teams/teamIdorGroupId/sendActivityNotification
Replace teamIdorGroupId from the compose action
Body:
{
  "topic": {
    "source": "entityUrl",
    "value": "https://graph.microsoft.com/v1.0/teams/@{outputs('Compose-TeamIdorGroupId')}/channels/@{outputs('Compose-ChannelID')}/messages/@{outputs('Compose-MessageId')}"
  },
  "activityType": "informationBroadcasted",
  "previewText": {
    "content": "Urgent Information"
  },
  "recipient": {
    "@odata.type": "microsoft.graph.teamMembersNotificationRecipient",
    "teamId": "@{outputs('Compose-TeamIdorGroupId')}"
  },
  "templateParameters": [
    {
      "name": "broadcastedBy",
      "value": "Mohamed Ashiq Faleel"
    }
  ]
}
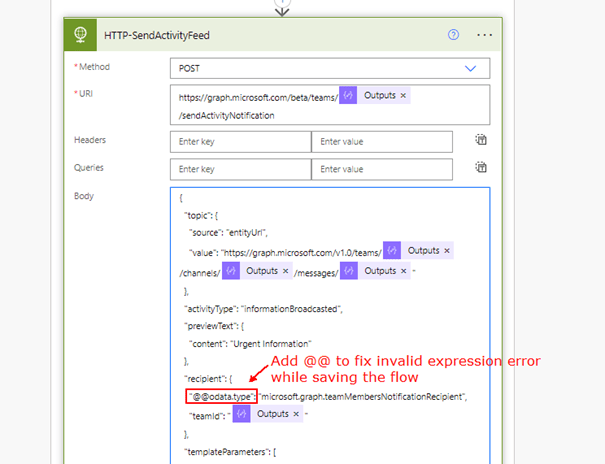
If you are having issues (Invalid Expression) while saving the flow, add additional @ keyword in the recipient as shown below
Click Show advanced options in the HTTP action to enter the Authentication details. Enter the Client (Application) ID, Secret and Tenant Id from Step 2

Time to test the Power Automate flow. Find below the Activity Feed message for a Teams user

Note:
The Teams app can also be enabled with Resource Specific Consent, to do so in the Teams Developer portal click Permissions on the Left bar. In the section Team Permissions select TeamsActivity.Send.Group under Application. If you have done this, Step 2 is not required. I will cover this in a different blog post.
Power Automate standard action: Post a feed notification:
There is a standard Teams action Post a feed notification which creates an activity feed with/without Deep link to a chat or Teams Channel using the Power Automate Teams Bot. Find below the action

Summary:
Isn’t this powerful to have engaging and actionable content for the users in Teams. There can be many use cases which could be applied for this setup e.g: Notify user and deep link to a Power App added in Teams channel etc. Hope you have found this informational & thanks for reading. If you are visiting my blog for the first time, please do look at my other blogposts.
Do you like this article?
Subscribe to my blog with your email address using the widget on the right side or on the bottom of this page to have new articles sent directly to your inbox the moment I publish them.