If you have a requirement to access graph endpoint as a signed in user/account on an instant/automated/scheduled flow, this blog post will help you with instructions and steps to access the Microsoft graph API with delegated permissions using the
- HTTP connector
- Invoke an HTTP request connector
There are resources (Presence information, Planner etc) in Microsoft graph which is available only as delegated permissions and not as application permission. Application permissions can be granted only by an administrator but users can register an application with delegated permission (Except All permission) unless the IT team has restricted the app registration by users.
Access Graph API using HTTP connector:
I have used the HTTP connector to generate a token for accessing the Graph API using the OAuth resource owner Password Credentials grant authentication flow supported by Microsoft Identity platform with the User ID and Password. Once we have the access token, the request to the Graph API endpoint will be made. To follow along this post be ready with the following
Pre-Requisites:
- Access to HTTP Premium Connector in Power Automate
- Access to register Azure AD Application in Azure AD Portal
- A service account without MFA enabled
- User ID
- Password
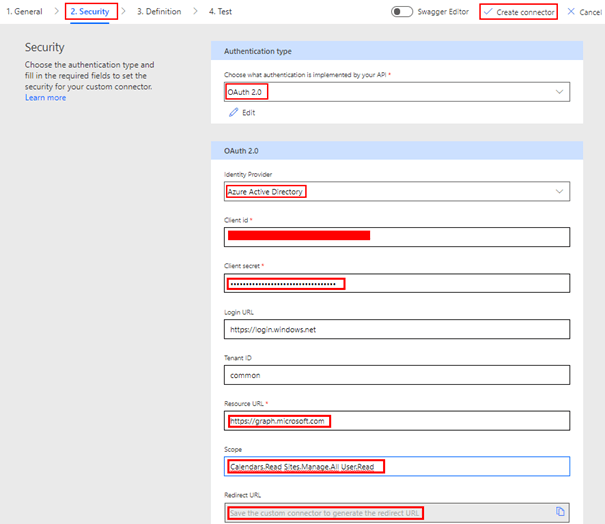
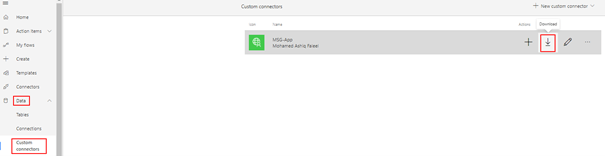
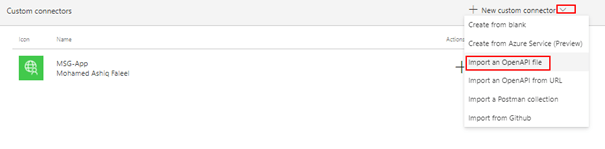
If you have an account with MFA enabled, then you should be creating a Custom connector. I have written a blog post on creating a custom connector to call Microsoft Graph API for Power Apps and Power Automate.
Azure Active Directory Application:
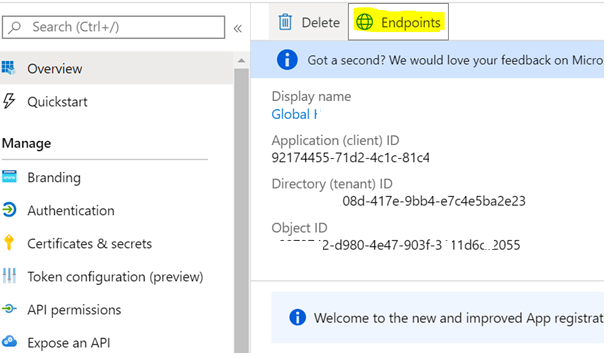
Register an application in Azure AD and obtain the client id, client secret & tenant id for the registered application. In this example I have added the delegated permission Presence.Read to get the presence information of the service account.

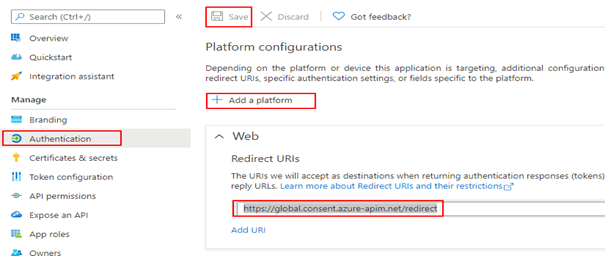
Add the redirect URI for the web http://localhost as shown on the screenshot below.

The Web redirect URI http://localhost/ is required to provide consent for the Azure AD application for the permission scope by the service account. The consent can be provided by an admin to use this application in flow by all users or the consent has to be provided by an individual user. To provide consent by an individual user in this case by the service account, construct the following url using the tenant ID, Client ID and the scope (ex. Presence.Read)
Individual User Consent URL:
https://login.microsoftonline.com/yourtenantID/oauth2/v2.0/authorize?
client_id=azureadappclientid
&response_type=code
&redirect_uri=http://localhost/
&response_mode=query
&scope=https://graph.microsoft.com/Presence.Read
If there are multiple delegated permissions, the scope should be separated by a space (%20)
scope=https://graph.microsoft.com/Presence.Read%20
https://graph.microsoft.com/Sites.Read.all
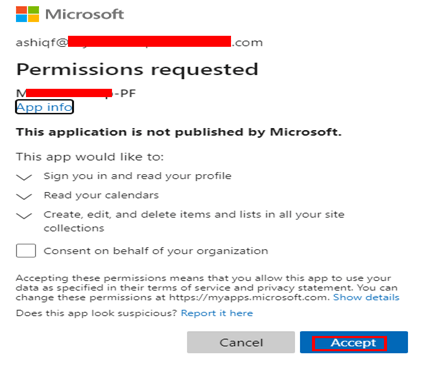
Now login to Office.com with the service account and enter the above User Consent url on a separate tab for the consent which will bring up a screen similar to the one shown below
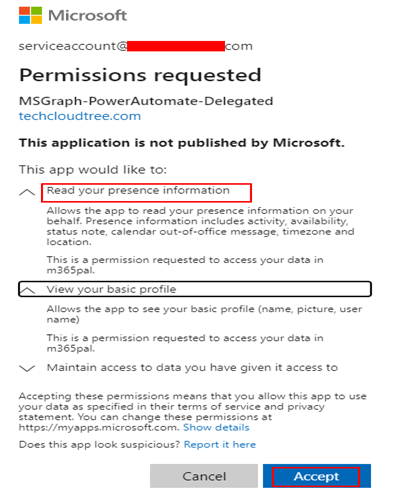
Now Click the Accept button to provide consent for the requested permission for the service account. After the Accept button is clicked there will be a message stating that this site cannot be reached or something similar with the url like below on the browser address bar
http://localhost/?code=xxxxxxxxxxxxxxxxxx&session_state=xxxx-xxx-xxx-xx-xxxxx
The consent is provided, to validate the consent login to My Applications link url and the select the Azure AD application from the list and then click Manage your application as shown below

Find below screenshot with consent for Presence.Read permission. To revoke the permission, click Revoke permissions

To provide Admin consent for all the users to use this app in the flow, the URL is
https://login.microsoftonline.com/yourtenantID/adminconsent?client_id=azureadappclientid
Power Automate Flow:
Now we are ready to generate the graph token using the HTTP connector in flow which is a pre-requisite to call the Graph API endpoint. To generate a token in Flow
- Store the Client Secret on a String variable
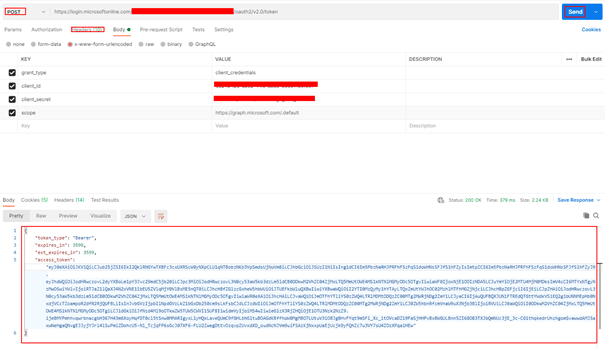
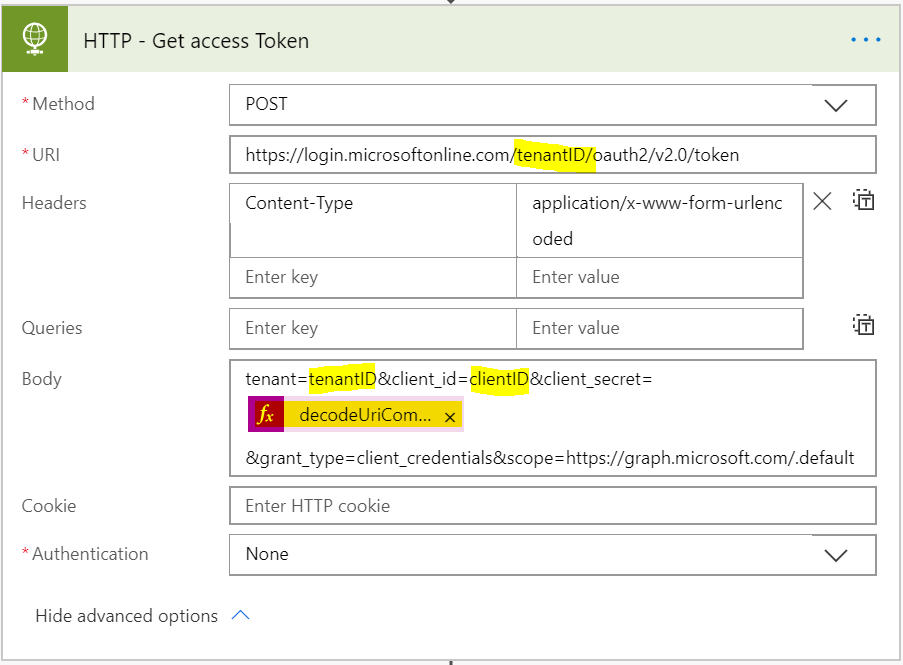
- Make the following HTTP request using the HTTP connector
HTTP Method: POST
URI: https://login.microsoftonline.com/yourtenantID/oauth2/v2.0/token
Headers: Content-Type: application/x-www-form-urlencoded
Body:
Replace the client id, service account username and password
client_id=azureadappclientid&username=serviceaccount@yourdomain.com&password=serviceaccountpassword&grant_type=password&client_secret=azureadappclientsecret&scope=Presence.Read%20offline_accessFor the client secret and password (only if there is special character), make sure to URL encode using the expression encodeUriComponent(variables(‘clientSecret’)) else the request will fail due to the presence of special characters.

If there is no consent provided by the user/service account for the Azure AD application then the above HTTP request will generate the following error
{“error”:”invalid_grant”,”error_description”:”AADSTS65001: The user or administrator has not consented to use the application with ID ‘xxxxxxx-65xx-47e0-xxxx-xxxxx0bb22′ named AzureADAppName’.
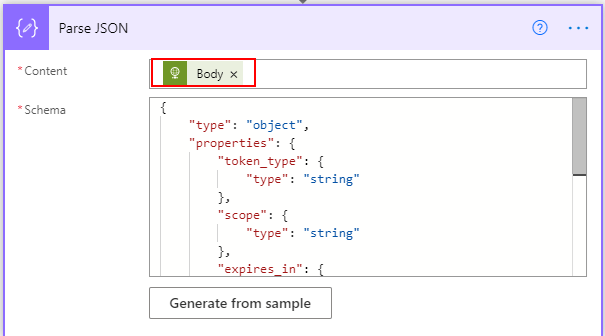
To extract the token from the above request, add the parse JSON action with Content from the HTTP request body and the following schema
{
    "type": "object",
    "properties": {
        "token_type": {
            "type": "string"
        },
        "scope": {
            "type": "string"
        },
        "expires_in": {
            "type": "integer"
        },
        "ext_expires_in": {
            "type": "integer"
        },
        "access_token": {
            "type": "string"
        },
        "refresh_token": {
            "type": "string"
        }
    }
}
Add the Body from the dynamic content from the HTTP – GET Token action to the content of the Parse JSON action
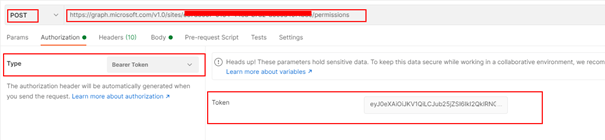
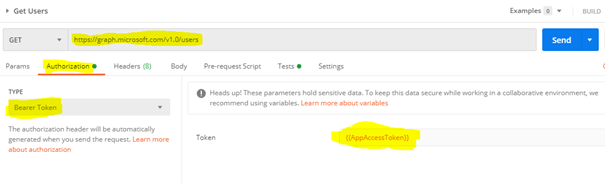
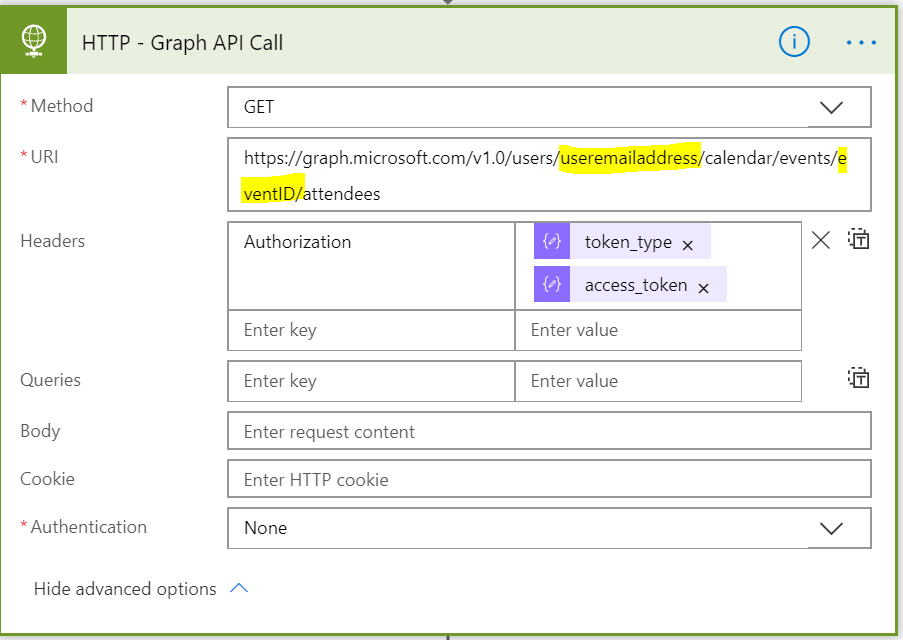
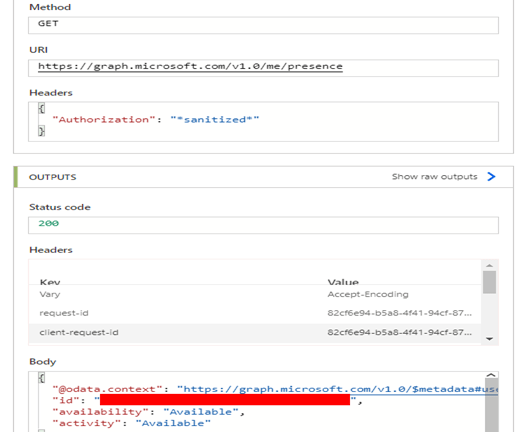
Include the access token when calling the Microsoft Graph API on the Headers sections as shown below. The access_token is from the output of the Parse JSON action

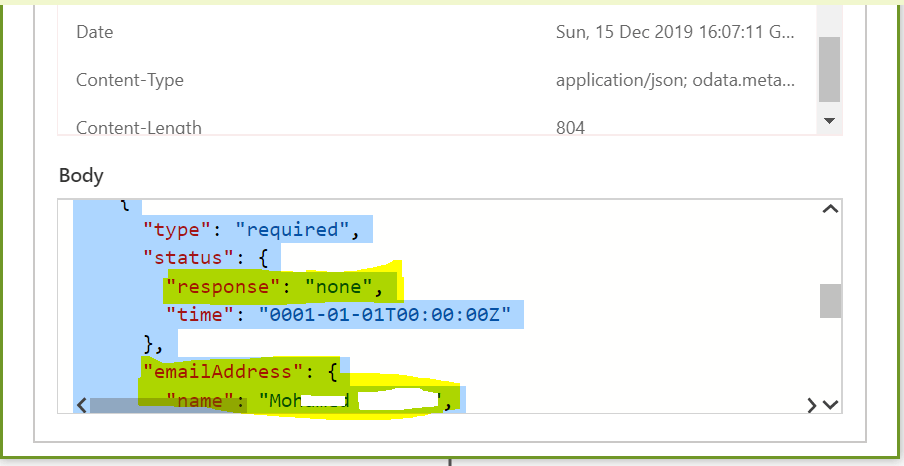
If you run the flow, you can now see the response with the presence information of the service account as shown below
Use Azure Key vault connector to secure the Client Secret & Password information in the flow.
Invoke a HTTP Request connector:
This connector can be used to fetch resources from various web services authenticated by Azure AD including Microsoft Graph in more easier way. Look for the action with the keyword invoke an HTTP request

If it is accessed for the first time, enter https://graph.microsoft.com on both Base and Azure AD resource URI and then click Sign In

Enter the Graph API endpoint on the Url of the request and select the Method

The API is executed in the context of the action’s connection as shown below. In this example it gets the profile information of the serviceaccount

If you get an error similar to { “error”: { “code”: “Forbidden”, “message”: “” } }, then it could be because the connector has a limited set of scopes. Getting Presence information is not supported with this connector as of now. If your scenario requires something more advanced or not currently supported by the connector, please use the �HTTP� connector as shown above or create a custom connector.
Reference:
https://docs.microsoft.com/en-us/graph/auth/auth-concepts#delegated-and-application-permissions
Call Microsoft Graph API in Power Apps and Power Automate using a Custom connector
Summary: There are many endpoints available with Microsoft graph which can be leveraged for different use cases. Keep in mind the HTTP connector in Power Automate is Premium, you can also consider using this approach in Azure Logic apps. The access token is valid only for an hour, if you have to call a graph api after an hour from the initial token generation time the token has to be obtained again. Hope you have found this informational & thanks for reading. If you are visiting my blog for the first time, please do take a look at my other blogposts.