
If you have a requirement to copy a site template (Site Pages including images & webpart, site column, site content type, navigation etc) from an existing SharePoint site & apply it to a recently created SharePoint site, this blog post would be helpful.
Pre-requisites:
- SharePoint site collection administrator
- SharePoint site with a custom list associated to a Flow
- Access to Premium connector (Azure Automation) in Power Automate
- Azure subscription to create Azure Automation Runbook

SharePoint Patterns and Practices (PnP) community has developed a library of PowerShell commands (PnP PowerShell) that allows you to perform complex provisioning and artefact management actions towards SharePoint. On this example I will be using PnPProvisioningTemplate cmdlet’s to copy the pages including the assets & webparts to another site but you can do much more than this. Find the PnP cmdlets I will using
To generate a .pnp package (Site Template) from the source site
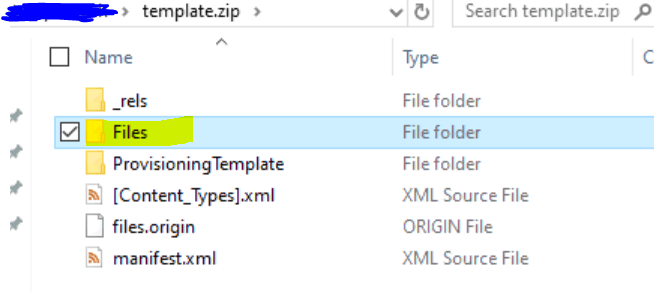
Get-PnPSiteTemplate -out template.pnp -Handlers PageContents -IncludeAllClientSidePages -PersistBrandingFilesThe parameter -PersistBrandingFiles saves all the asset files including the image files from the Site Assets library that makes up the composed look of page. Parameter -Handlers <Handlers> processes only the information passed to it. On the above example it processes only the Pages & its associated contents & not lists etc The PnP cmdlet Get-PnPSiteTemplate creates a package with extension .pnp which can be converted to a ZIP package by changing the extension to .ZIP from .pnp. Look at the Get-PnPSiteTemplate documentation for the various parameters it supports.
Once the package .pnp file is ready, the package can be applied to another site using the command Invoke-PnPSiteTemplate
To Apply the Template to a destination site (Apply template to site):
Invoke-PnPSiteTemplate .\template.pnpIf you want to test these commands in PowerShell console on your local computer, install the PnP module
Keep in mind before executing the PnPSiteTemplate commands, the site context must be created for both source & target site by creating a connection as shown below
Connect-PnPOnline -url "sourcesiteurl"
Get-PnPSiteTemplate -out template.pnp -Handlers PageContents -IncludeAllClientSidePages -PersistBrandingFiles
Connect-PnPOnline -url "targetsiteurl"
Invoke-PnPSiteTemplate .\template.pnp
For interactive login, use command
Connect-PnPOnline -url “sourcesiteurl” -UseWebLogin
or
Connect-PnPOnline -url “sourcesiteurl” -Interactive
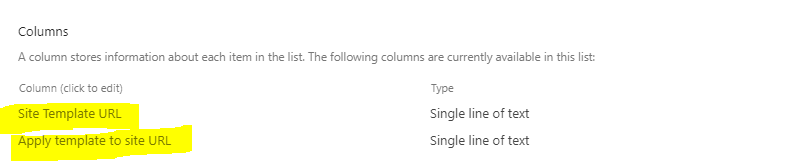
Setup SharePoint List:
Till now you would have got some ideas about the PnP commands we will be using on the Azure Automation runbook, let’s now create the SharePoint list to collect the Source (Template to be copied from) & target URL (Template to be applied) for the SharePoint site. Find the list Schema for the List to be named as Site Template
Azure Automation Runbook:
The list is ready, let us now create the Azure automation runbook. I’ve written a post Execute SharePoint Online PowerShell scripts using Power Automate, it will help you with steps (Step 1 – Create automation account, Step 2 – Import SharePointPnPPowerShell Online PowerShell Module & Step 3 – Add user credentials) to create the automation account & runbook to execute the PnP PowerShell command for copying & applying the site template.
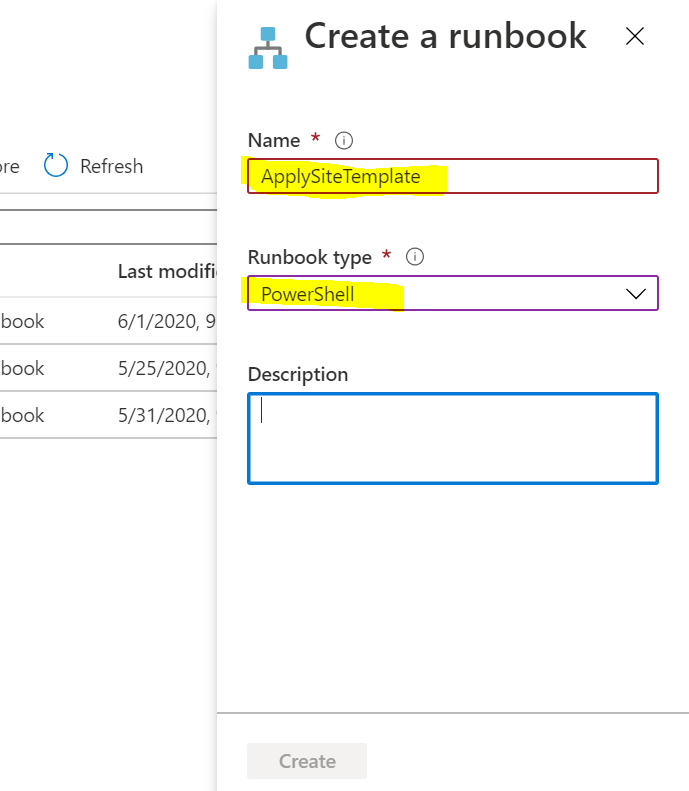
Step 4: Now we are good to create the Runbook, to create it click Runbooks under the section Process Automation and then click Create a runbook. Enter the Name of the Runbook ApplySiteTemplate, select the Runbook type to PowerShell and click Create.
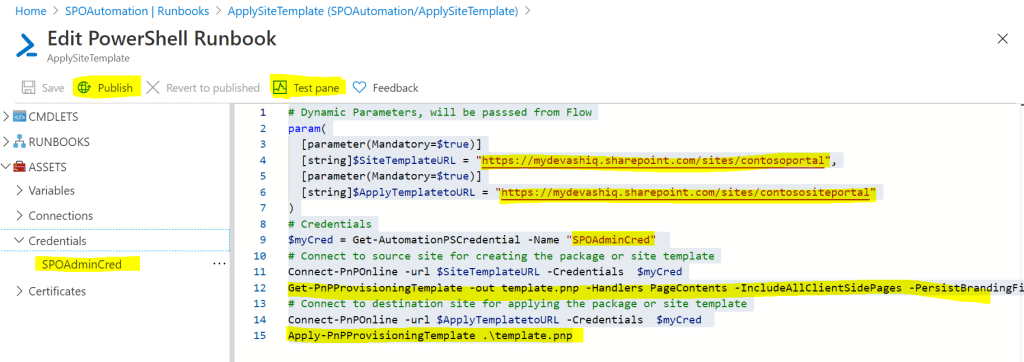
Now let’s add the code by editing the runbook. The section Dynamic Parameters on the code will be passed from the flow. To connect to SharePoint Online site, we are using the SPO admin credentials created in Step 3. Find the code below
# Dynamic Parameters, will be passed from Flow
param(
  [parameter(Mandatory=$true)]
  [string]$SiteTemplateURL = "https://mydevashiq.sharepoint.com/sites/contosoportal",
  [parameter(Mandatory=$true)]
  [string]$ApplyTemplatetoURL = "https://mydevashiq.sharepoint.com/sites/contosositeportal"
)
# Credentials
$myCred = Get-AutomationPSCredential -Name "SPOAdminCred"
# Connect to source site for creating the package or site template
Connect-PnPOnline -url $SiteTemplateURL -Credentials  $myCred
Get-PnPSiteTemplate -out template.pnp -Handlers PageContents -IncludeAllClientSidePages -PersistBrandingFiles
# Connect to destination site for applying the package or site template
Connect-PnPOnline -url $ApplyTemplatetoURL -Credentials  $myCred
Invoke-PnPSiteTemplate .\template.pnp
The runbook is now created, you can test the script by clicking on Test Pane & pass parameters (Site URL etc) to test it. Click Publish button as shown below to publish so that it can be called from Power Automate.
You can also create the template (PnP Package) for a site & store it on a SP library. The PnP command to get the file
Connect-PnPOnline -url "siteurlwhichhasthePnPpackagefile" -Credentials  $myCred
Get-PnPFile -Url "/sites/sitenamewithPnPPackagefile/Shared Documents/template.pnp" -Filename "template.pnp" -AsFile
You can use a certificate instead of Username and Password to get a APP only access token to call PnP commandlet, for more details check the documentation for Connect-PnPOnline. It’s now time to create the flow to call the Runbook.
Power automate flow to call the Run Book:
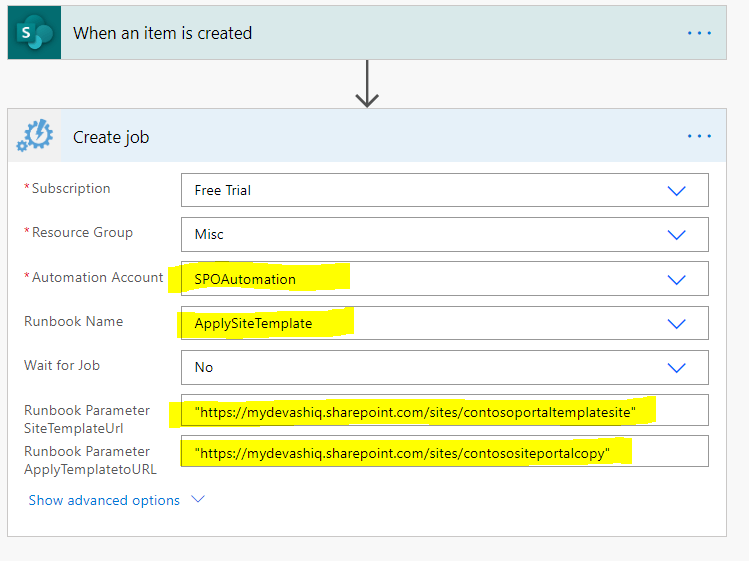
You can now create a flow with automated trigger “When an item is created” from the SharePoint list created earlier to pass the Site Template URL & Apply to Site Template URL. Once the flow is created, add the action “Create Job” under the connector “Azure Automation” which is a premium connector.
Select the Azure Subscription which has the Automation account resource with runbook>Select Resource Group>Select Automation Account>Select the Runbook name which has the PS script. If there is a need to wait until the automation job completes then select Yes on the field “Wait for Job”. Enter the URL for SiteTemplateURL & ApplyTemplatetoURL
The flow is ready, run it to test now with parameters. I’ve used this sample to test a site (Template) which has
- Customized home page with couple of standard webpart & images
- 2 more pages with images & other standard webparts
has copied to another site. If there is a custom webpart on the source site which is added to a page, make sure to deploy it on the destination site.
Summary: Take a look at the SharePoint starter kit PnP package to explore more about the usage of different features in PnP provisioning. This example can also be extended with Site design & Site script which has the capability to call a flow. Hope you have enjoyed reading this post and find it useful. If you have any comments or feedback, please provide it on the comments section below.
