On this blogpost let us see how to add a custom domain and configure exchange email address for the added domain in a Microsoft 365 tenant. This will allow you to create M365 identities for the users in the Microsoft 365 tenant like user@domain.com instead of user@domain.onmicrosoft.com. This setup is also required if you have a Hybrid setup with users from Onpremise Active directory. Azure AD connect tool helps you synchronize your AD identity from Onpremise to Azure AD or Microsoft 365 tenant directory only if there is a custom domain added to the directory. The custom domain can be added from Microsoft 365 tenant admin center or Azure Active directory portal associated to the M365 tenant.
Pre-Requisites:
- Own a Domain from any domain providers
- Global administrator of Microsoft 365 tenant
If you don’t add a domain, user account in your organization will use the default onmicrosoft.com domain for their email address and UPN. To setup and configure a custom domain, you will have to
- Add a TXT or MX record
- Add DNS records to connect Microsoft 365 services
For this blog post I have used Domain.com provider to add the DNS records for the custom domain
Add a TXT or MX record:
The first step is to prove you are Owner of the domain and also make the domain is not associated to different tenant. To generate the DNS record values and to add the custom domain login to the Microsoft 365 Admin Center
- Select Show all > Settings > Domains
- Click Add domain
- Enter the custom domain name you own
- Click on the button Use this domain
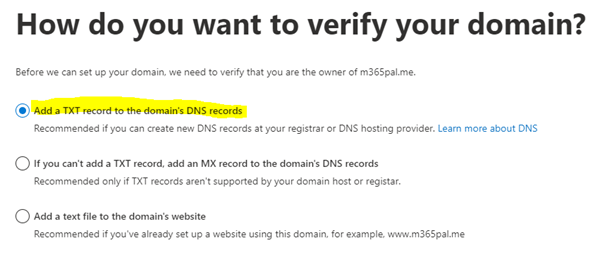
Select Add a TXT record to the domain’s DNS records but you can also add a MX record or add a text file to the domain’s website. Find the different options
- The DNS record values for the TXT record will be generated as shown below. TTL 3600 seconds is 1 hour
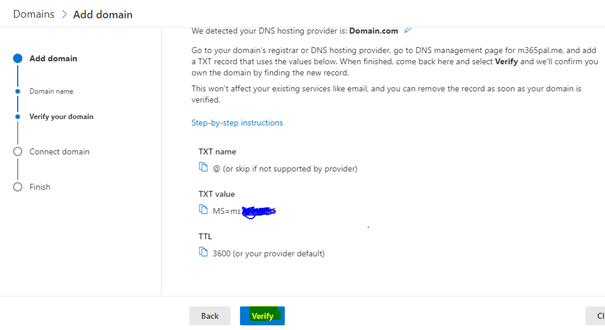
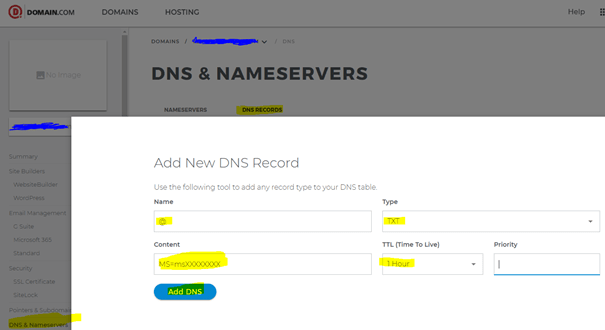
- Add the DNS record for TXT from the domain provider interface for managing the records
- Go back to the Admin center and then click Verify. It takes around 15 mins to an hour for the DNS records to propagate, sometimes it may even take more time. Keep trying till the domain in verified. Once the domain is verified you will be able to proceed to the next step for configuring the Microsoft 365 services like exchange etc. You can also Skip and do the configuration later but with this setup you can create user accounts by using the custom domain as its UPN e.x user@domain.com without email address. Find instructions on this link to add a custom domain from Azure Active directory portal.
Add DNS records to connect Microsoft 365 services:
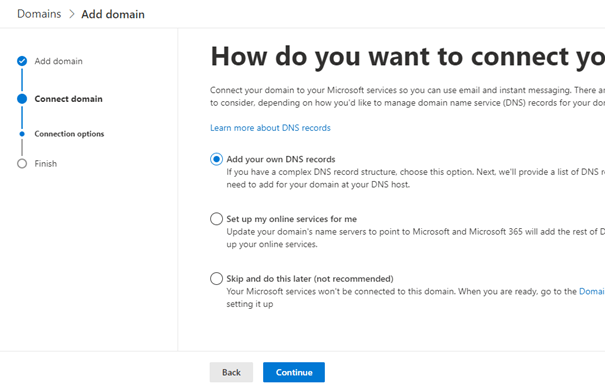
The domain is added & verified, now its time to connect the Microsoft services like Email (Exchange Online, Outlook), Mobile device Management aka MDM with the custom domain. On this post will be connecting only to Exchange online to receive email through Microsoft 365. After this setup is done Exchange online will be your new email host for the domain. After the domain is verified from the step above, select Add your own DNS records and click Continue button as shown below
The following DNS records will be generated as shown below
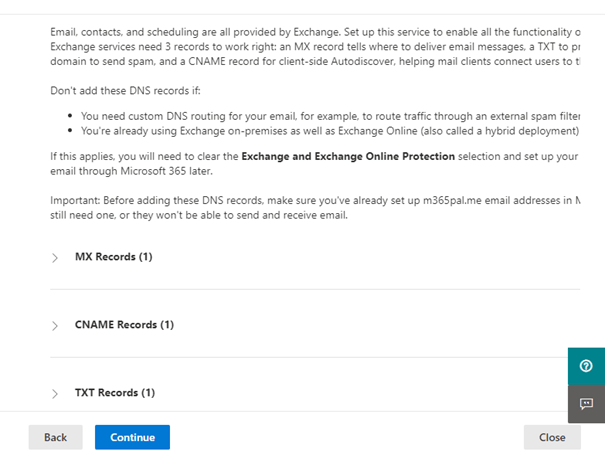
- MX Records (Mandatory)
- Sends incoming mail for your domain to the Exchange Online service in Office 365. Mails are delivered to the mail exchange server with the lowest preference number for this record, typically.
- CNAME Records (Optional: For Outlook client to work)
- Helps Outlook clients to easily connect to the Exchange Online service by using the Autodiscover service. Autodiscover automatically finds the correct Exchange Server host and configures Outlook for users
- TXT Records (Optional: SPF record for prevention of spamming)
- Helps to prevent other people from using your domain to send spam or other malicious email. Sender policy framework (SPF) records work by identifying the servers that are authorized to send email from your domain
Go back to the domain hosting provider interface to add the above DNS records, to get the values for each record expand each record shown on the above interface.
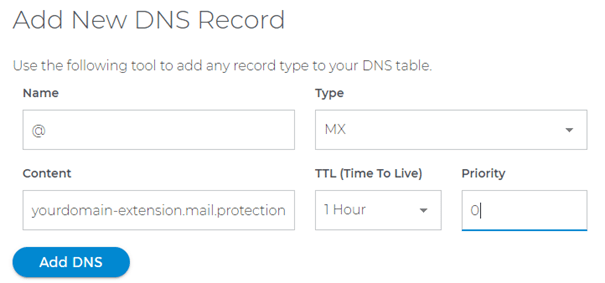
MX Record:
Set the priority to the Highest or to the number 0 and then add the DNS record. If the domain is xyz.com
Sample value/Content: xyz-com.mail.protection.outlook.com
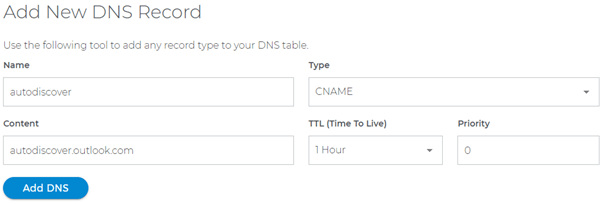
CNAME Records:
Name: Autodiscover
Value/content: autodiscover.outlook.com
TTL: 1 hour
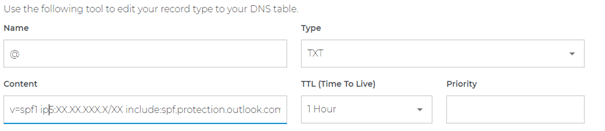
TXT Records (SPF):
There can be only one SPF record on the DNS records so if there are another record already (default), refer this link for more information. I already had the default one so the valye for the TXT record looked like v=spf1 ip5:XX.XX.XXX.X/XX include:spf.protection.outlook.com -all
ipX:XX.XX.XXX.X/XX is the default one
Now after all the DNS records are added, choose Continue. This will take you to the last page of the wizard with the message Domain setup is complete
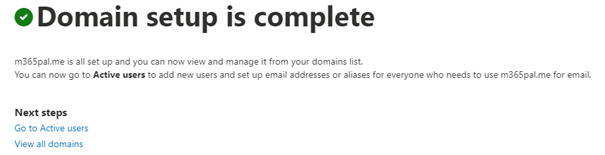
Now the setup is completed, you can create users using the new custom domain or change an existing users UPN and email address on Admin center with the following steps
- Go to Users > Active users page
- Select the user’s name, and then on the Account tab select Manage username.
- On the Aliases box, enter the new alias@yourdomain.com and then click Add
- Select the new alias and if required change it to the primary email.
Summary: On this post we have seen how to configure a custom domain with email. There can also be multiple domains in one tenant. Hope you have found this informational. Let me know any feedback or comments on the comment section below
Reference:
https://docs.microsoft.com/en-us/microsoft-365/admin/setup/add-domain
https://docs.microsoft.com/en-us/microsoft-365/admin/setup/domains-faq?view=o365-worldwide
https://docs.microsoft.com/en-us/microsoft-365/enterprise/external-domain-name-system-records
